【ワードプレス ウィジェット】デフォルトのウィジェット・カレンダーを使ってみる
ワードプレスのウィジェットにカレンダーがあります。
特に必要ないかな。と思っていましたが折角ウィジェットで用意されてますので試しに使ってみます。
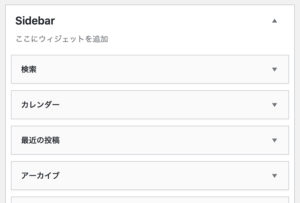
まずウィジェットなのでサイドバーに設置してみます。
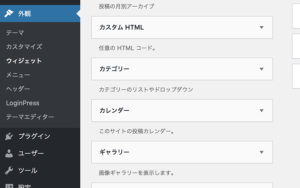
管理画面からウィジェット→その中にカレンダーがあります。
カレンダーをドラッグ&ドロップしてウィジェットを追加してみます。
特にタイトルとか入れず保存します。
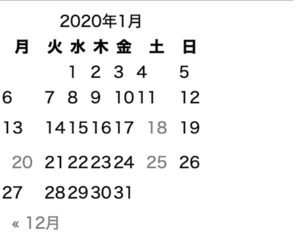
サイトを表示してみます。
自作のワードプレス・テーマですので崩れていますが<table>で組んでありますのでそれほど崩れてないようです。
私は投稿した記事の中にカレンダーを表示させています。
ワードプレス純正カレンダーは記事確認がメイン
カレンダーの機能として投稿した月のカレンダーが自動的に表示するようです。
1月に投稿したのであれば1月のカレンダー、3月であれば3月のカレンダーという風に投稿した日時と連動しています。
例えば1月25日の投稿するとカレンダーの1月25日のところにリンクが張られ、それをクリックすると1月25日に投稿した記事の一覧をアーカイブで見ることができます。
月単位でもアーカイブ一覧が見れるようになっているようで、カレンダーの下に月名がリンク付きで表示されています。
クリックするとその月に投稿した記事の一覧がアーカイブで表示されます。
ワードプレスのカレンダーはイベントカレンダー的な使い方では無く、あくまでも投稿記事を見やすくするためのカレンダーのようです。
See the Pen
Wordpress calendar by tatsuya☆ラボラトリ【 tatsuya-lab.com 】 (@labtatsuya)
on CodePen.
それではカレンダーの見た目をいじっていきます。
まずはウィジェット・カレンダーのタグ構成です。
HTML
<!DOCTYPE html>
<html lang="ja">
<head>
<meta charset="UTF-8">
<title>calendar</title>
<link rel="stylesheet" href="base.css">
</head>
<body>
<section id="calendar-2" class="widget widget_calendar">
<div id="calendar_wrap" class="calendar_wrap">
<table id="wp-calendar">
<caption>
2020年3月
</caption>
<thead>
<tr>
<th scope="col" title="月曜日">月</th>
<th scope="col" title="火曜日">火</th>
<th scope="col" title="水曜日">水</th>
<th scope="col" title="木曜日">木</th>
<th scope="col" title="金曜日">金</th>
<th scope="col" title="土曜日">土</th>
<th scope="col" title="日曜日">日</th>
</tr>
</thead>
<tfoot>
<tr>
<td colspan="3" id="prev"><a href="https://tatsuya-lab.com/2020/02/">« 2月</a></td>
<td class="pad"> </td>
<td colspan="3" id="next" class="pad"> </td>
</tr>
</tfoot>
<tbody>
<tr>
<td colspan="6" class="pad"> </td>
<td><a href="https://tatsuya-lab.com/2020/03/01/" aria-label="2020年3月1日 に投稿を公開">1</a></td>
</tr>
<tr>
<td><a href="https://tatsuya-lab.com/2020/03/02/" aria-label="2020年3月2日 に投稿を公開">2</a></td>
<td>3</td>
<td><a href="https://tatsuya-lab.com/2020/03/04/" aria-label="2020年3月4日 に投稿を公開">4</a></td>
<td>5</td>
<td><a href="https://tatsuya-lab.com/2020/03/06/" aria-label="2020年3月6日 に投稿を公開">6</a></td>
<td><a href="https://tatsuya-lab.com/2020/03/07/" aria-label="2020年3月7日 に投稿を公開">7</a></td>
<td><a href="https://tatsuya-lab.com/2020/03/08/" aria-label="2020年3月8日 に投稿を公開">8</a></td>
</tr>
<tr>
<td>9</td>
<td><a href="https://tatsuya-lab.com/2020/03/10/" aria-label="2020年3月10日 に投稿を公開">10</a></td>
<td><a href="https://tatsuya-lab.com/2020/03/11/" aria-label="2020年3月11日 に投稿を公開">11</a></td>
<td><a href="https://tatsuya-lab.com/2020/03/12/" aria-label="2020年3月12日 に投稿を公開">12</a></td>
<td><a href="https://tatsuya-lab.com/2020/03/13/" aria-label="2020年3月13日 に投稿を公開">13</a></td>
<td><a href="https://tatsuya-lab.com/2020/03/14/" aria-label="2020年3月14日 に投稿を公開">14</a></td>
<td><a href="https://tatsuya-lab.com/2020/03/15/" aria-label="2020年3月15日 に投稿を公開">15</a></td>
</tr>
<tr>
<td><a href="https://tatsuya-lab.com/2020/03/16/" aria-label="2020年3月16日 に投稿を公開">16</a></td>
<td><a href="https://tatsuya-lab.com/2020/03/17/" aria-label="2020年3月17日 に投稿を公開">17</a></td>
<td id="today">18</td>
<td>19</td>
<td>20</td>
<td>21</td>
<td>22</td>
</tr>
<tr>
<td>23</td>
<td>24</td>
<td>25</td>
<td>26</td>
<td>27</td>
<td>28</td>
<td>29</td>
</tr>
<tr>
<td>30</td>
<td>31</td>
<td class="pad" colspan="5"> </td>
</tr>
</tbody>
</table>
</div>
</section>
</body>
</html>
<table id=”wp-calendar”>の幅を100パーセントにして全体の文字サイズを12ピクセルにしてみます。
CSS
#wp-calendar{
  width: 100%;
  font-size:12px;
  padding-top: 10px;
}
きっちり並べるために<tr>にflexboxをかけて均等に並べます。
CSS
#wp-calendar tr{
  display: flex;
}
<th>と<td>をflexboxをかけて並べるためdisplayをblockにしておきます。
これを設定しておかないとflexがかかりません。
幅を7等分するためcalc関数を使います。
CSS
#wp-calendar th,
#wp-calendar td{
  display: block;
  width: calc(100% / 7);
  text-align: center;
  margin-bottom: 10px;
}
カレンダーのコマの揃えですが基本左揃えにしています。
CSS
#wp-calendar tr{
  display: flex;
  justify-content: flex-start;
}
ただ最初の週のコマは右揃えにします。
CSS
#wp-calendar tr:first-of-type{
  justify-content: flex-end;
}
一応日曜日は赤色にしてみます。
CSS
#wp-calendar td:last-of-type,
#wp-calendar th:last-of-type{
  color: red;
}
リンクの妙な余白を消します。
CSS
#wp-calendar td a{
  padding: 0;
}
<tfoot>の中の<td>に各月の名前が入ってますのでその部分の設定をflexboxで横に並べて3等分しておきます。
CSS
#wp-calendar tfoot tr{
  display: flex;
  justify-content: center;
}
#wp-calendar tfoot tr td{
  width: calc(100% / 3);
}
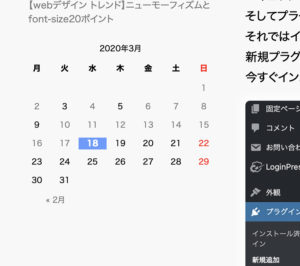
カレンダーの中で当日になっているコマは目立つように背景色をつけます。
CSS
#wp-calendar #today a,
#wp-calendar #today{
  color: white;
  background-color:#6699ff;
  font-weight:bold;
}
完成の図です。


